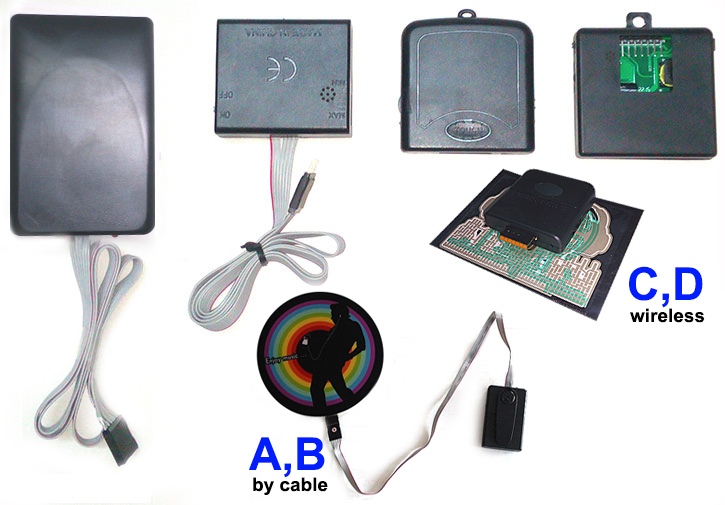
We can provide four types of AAA battery pack solutions for small size EL panels:
|
Type A (4AAA)
|
Type B (2AAA)
|
Type C (2AAA)
|
Type D (2AAA)
|

|
Type
|
A
|
B
|
C
|
D
|
|
Battery pack
|
4 AAA
|
2AAA
|
2AAA
|
2AAA
|
|
Width, mm
|
84
|
53
|
54
|
54
|
|
Heigh, mm
|
53
|
46
|
55
|
53
|
|
Thickness, mm
|
17
|
18
|
15
|
13
|
|
Conection type
|
cable
|
cable
|
wireless
|
wireless
|
|
Lighting area, cm2
|
300
|
200
|
200
|
200
|
|
Input for external 6V DC
|
+
|
|
|
+
|
|
Fixed Mode Animation
|
+
|
+
|
optional
|
+
|
|
Sound Activation Mode
|
+
|
+
|
+
|
+
|
|
Sound Sensor Adjustable
|
+
|
optional
|
+
|
+
|
|
Can be used as Badge
|
|
|
+
|
+
|
|
Can be paste on back side of EL panel for easy mount to shirts, backpack and wall. (with Velcro)
|
|
|
+
|
+
|
|
Summary
|
Maximum lighting area, multifunction
|
Small size, Best Price
|
Slim type Wireless
|
Ultra Slim Wireless Advanced
|
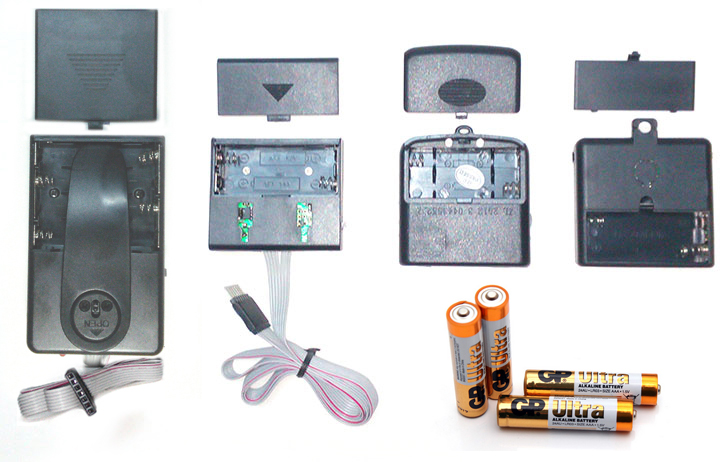
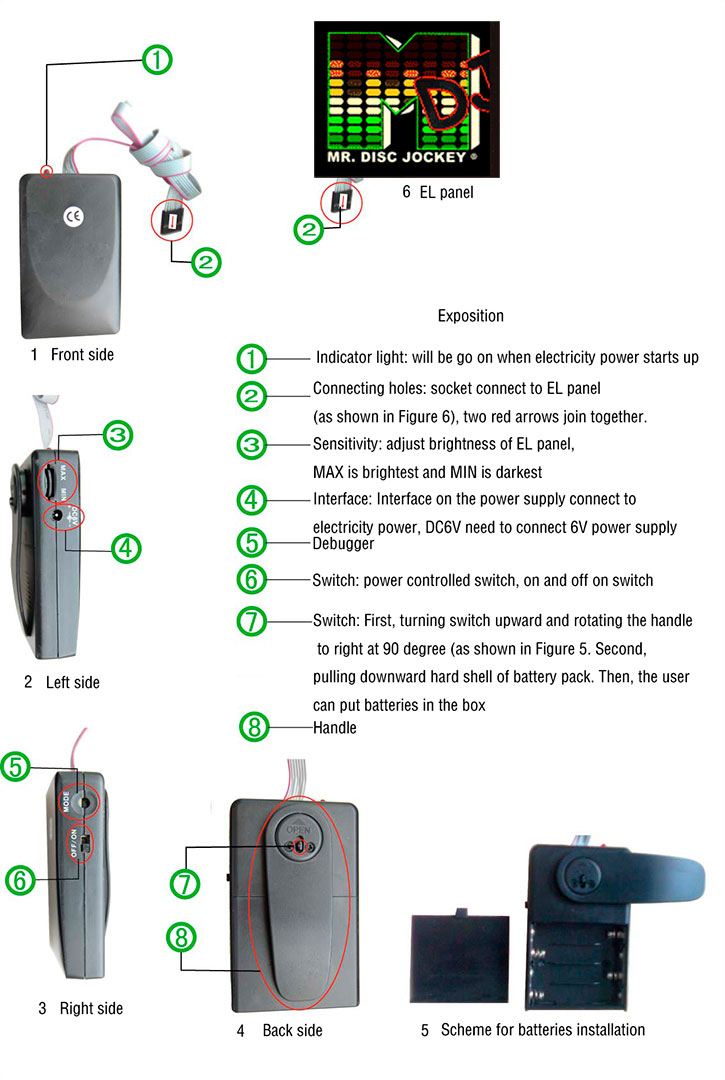
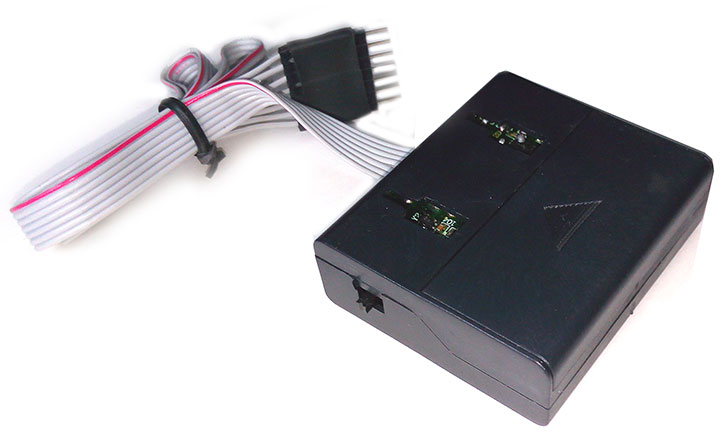
Type A Description:
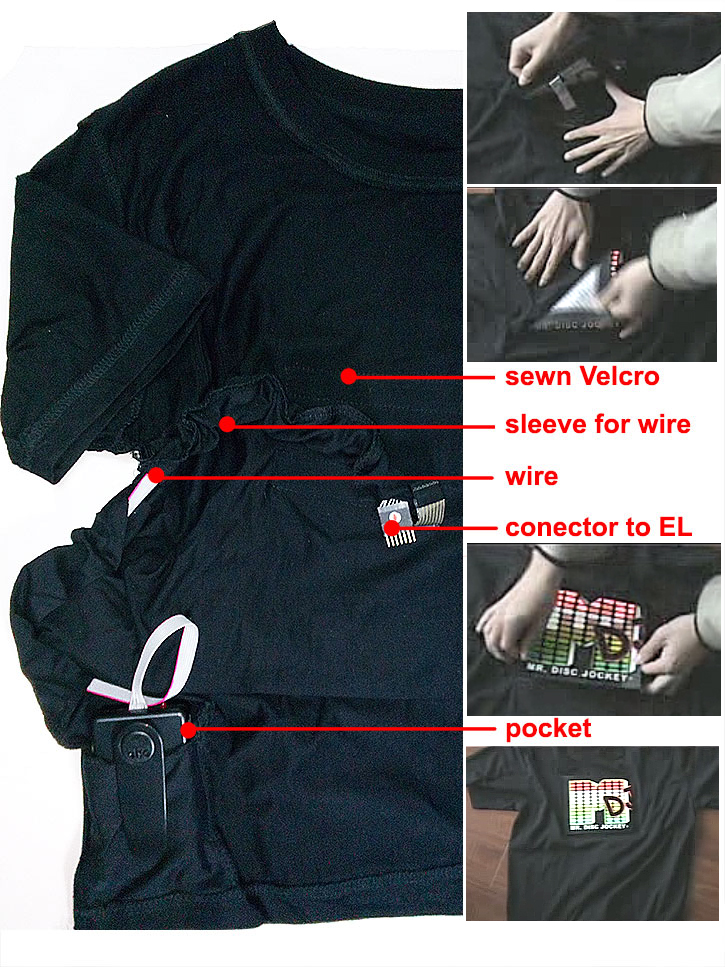
How to install Type A on T-Shirt
How to install Type B
The Type B can be installed on T-Shirt the same way as Type A.
Also, thanks to small size Type B suitable for: EL Gift Box solution (battery pack will be placed inside, EL panel can be mount on front side of Gift Box) ; EL POS or EL Labels on the bottle (battery pack will be mount on the back side of bottle by self-adhesive double side tape)
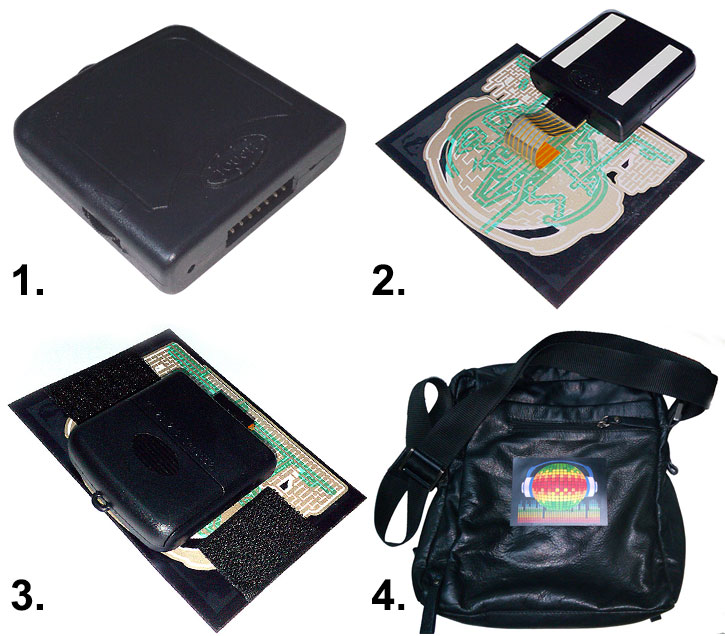
How to install Type C on Bag:
1. Install battery 2AAA in to the battery dock.
2. Place battery pack Type C on the EL panel, the button-side should be on the top. Remove protection paper strips from the both self-adhesive tapes. Connect EL panel to battery pack.
3. Place button side of battery pack to back side of EL panel. Fix two velco strips on the back side of EL panel.
4. Place other two parts of velcro on the bag.Install EL Panel on bag by velcro.
How to install Type C as "EL STICKER"

EL STICKER -is an thin, highly flexible graphic panel can be easy mount on to the shirt, backpack, cap or other clothes or surfaces. EL STICKER has a ultra slim battery pack that fits between panel and surface of installation. The battery pack unit has an ON/OFF switch, a small built-in sound sensor with adjustable sensitivity, which allows the user to adjust the way the panel reacts to louder or softer sounds. Also you can use switch button to select different modes of animation: sound activated or one of five fixed flash programs. The 2 X AAA batteries will last for up to 20 hours. Also, EL STICKER have 6V input and can be powered by 6V AC/DC adaptor - this option is very suitable for POS solutions.

Unique design of battery pack allow easy connect EL STICKER to battery pack and hide connector inside box. This way we can ensure using two parts as one, and exclude addition cables and limitations : flat cable, hole in t-shirts, pocket for battery pack, tunnel for flat cable etc,
The procedure of installation is very easy and fast.
1. remove paper from the two self-adhesive strips on the battery unit from the side where placed connector dock.
2.Turn back side of EL sticker to side where placed connector dock.
3.Connect connector from EL STICKER to connector inside dock on the battery unit.
4. Fix back side of panel to the body of battery unit .
5.Open battery dock and put 2 pcs of AAA according to marked "+" and "-". Turn ON .

We provide many types of solutions for mounting EL STICKER. You can install EL STICKER to t-shirts or other clothes used VELCRO or CLIP. If you need badge you can use PIN or RIBBON. For POS solutions EL STICKER can be mount to any surface by double sided self-adhesive tape. For more details please refer to videos below.
EL STICKER installed by VELCRO
EL STICKER installed by CLIP
EL STICKER installed as EL BADGE by PIN
EL STICKER installed as EL BADGE by ribbon
|

